Growing Cannabis Indoors
Published :
Jan 26, 2018
Categories :
Cannabis cultivation

You might think that growing cannabis is difficult, but it doesn't need to be. When you learn the basics of cannabis growing and how to avoid some common mistakes, growing cannabis indoors can be easy and rewarding. Find out more in the Zambeza indoor grow guide!
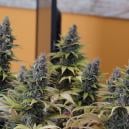
Many European cannabis cultivators who live in moderate climates grow their cannabis plants indoors. When you grow in a tent or a grow room, you are able to provide your plants with the best growing conditions. In addition to being in control of temperature and light exposure, indoor growing allows growers more privacy and security.
To get started on your first indoor grow, all you need to do is stick to our indoor grow guide. We cover all the essentials you need to know, teaching you how to avoid some all-too-common mistakes. Rest assured, you will master the art of cannabis growing in no time!
There are several variables to consider when attempting to grow weed indoors successfully. These include your grow room, lights, growing medium, plant containers, nutrients, proper watering, pH levels, air circulation, etc. But wait, let’s not get ahead of ourselves! Before we go into depth on these matters, let’s examine the first, most important aspect of starting your indoor cannabis grow: germinating your seeds!
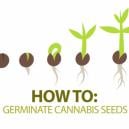
THE BEST WAY TO GERMINATE YOUR CANNABIS SEEDS
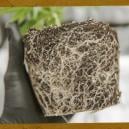
When you look around on the internet, you will come across a number of seed germination methods. Don’t let this overwhelm or confuse you. The simplest, low-risk way to germinate your seeds is to do so directly in the soil.
To begin, put your seeds about 1cm deep into your growing container with firmly packed, moist soil. Make sure that the grow environment temperature is not too hot and not too cold; a moderate temperature of 20-25°C is best for germination.
Some cannabis growers germinate seeds using other methods. The paper towel method is a fairly widespread practice, as is putting seeds in a glass of water. Frankly, these germination methods make things more complicated than they need to be. Germinating right in soil is the safest way as it poses the fewest risks to seedlings. Furthermore, as long as the container is large enough, your plant will not have to be transplanted and will grow to maturity in the same pot.
After you plant your seeds, make sure to keep the soil moist and do not allow it to dry out during this process. Likewise, make sure that you don’t overwater your freshly planted seed either.
The most important factor in successful seed germination is seed quality. Make sure that you only get best-quality cannabis seeds like those available at Zambeza. This ensures much higher germination rates. Quality seeds will normally sprout after just 2 to 3 days. Poor-quality seeds may take longer or won’t sprout at all!
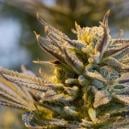
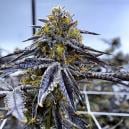
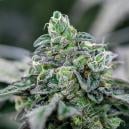
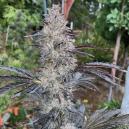
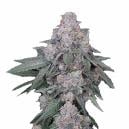
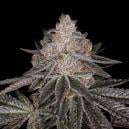
If you’re just starting out with indoor growing, we recommend the following strains.
THINGS TO CONSIDER WHEN GROWING CANNABIS INDOORS
YOUR GROW ROOM
We say “grow room”, but most don’t really need an entire commercial-sized room dedicated to cultivating a few plants. Many cultivators grow in their basement, in a closet, or a grow tent. With cannabis cultivation booming in recent times, many grow stores now offer tents in all sizes and price points, from simple setups to those complete with lights and air filters.
However, the first thing you’ll need to consider before purchasing a tent or making room in your basement is how many pants you intend to grow. When you are just starting out, it can be smart to focus on one or two plants. A small number of plants will require less space, and they are easier to monitor and move around if necessary. Likewise, should you encounter problems with your first grow that cause you to lose plants, the sacrifice will ultimately be easier on your wallet.
Fewer plants also means that you won’t need to invest as much into growing equipment such as lights, filters, and fans.

GROW LIGHTS
Cannabis needs a lot of light to grow. This makes your choice of grow lights one of the most important. There is a wide variety of grow lights available on the market today, but if there is one thing you should avoid, it’s getting cheap lights.
Take the advice of seasoned weed growers; a high-quality lamp can make all the difference. Let’s go over the common types of grow lights that you can get today.
• HID Grow Lights
HID (high-intensity discharge) grow lights are affordable, reliable, and efficient. When you grow using HID lights, you will normally want two types: metal halide (MH) lights that provide a “cooler” blueish light suitable for the vegetative phase, and high-pressure sodium (HPS) lights that give off a more reddish light spectrum suitable for the flowering phase.
• LED Lights
As of late, LED grow lights have become increasingly popular among cannabis cultivators. Compared to HID lights, LEDs have several advantages; they use less electricity and are therefore more efficient. LEDs also generate less heat compared to other grow lights. The downside with quality LED lights is that they cost more upfront. However, be aware that there are many low-quality LED lights on the market. A cheap
LED knock-off light may possibly save you some money at first, but investing in a reliable product that will last a long time will be worth it.
YOUR GROWING MEDIUM
Cannabis cultivation can be a very involved pastime. There are various cultivation methods such as hydroponics and aeroponics, and each has its pros and cons. For this guide, let’s focus on the most traditional and simple way of growing: soil. Keep in mind, growing in soil isn’t just for newbies; some master growers continue to use soil as their primary grow method. Growing in soil also has the advantage of being more forgiving in terms of mistakes, making it beginner-friendly.
NOT ALL POTTING MIXES ARE THE SAME
Yes, you might be able to get away with buying a sack of universal potting mix from the local grow store and successfully bringing your crop to harvest. Many times, however, this will not be the case. Plus, much better results can be achieved by using cannabis-specific soil. The soil itself should be rich and dark, but needs to also be well-draining.
Therefore, any soil with a muddy texture when wet is a no-go.
Most commercial potting mixes come pre-fertilised, but the nutrients in these soil mixes will normally not last for the entire duration of a grow. These mixes can provide your plants nutrients for a few weeks, perhaps even into the bloom phase. However, during bloom, plants require more PK and less N as compared to the veg. Some commercial potting mixes such as Miracle Grow may also contain so-called extended-release fertilisers. You should avoid these as they are great for ornamental plants, but not cannabis.
At some point, when you have more experience with growing, you could even make your own potting mix. Cannabis cultivators mix ingredients such as perlite, vermiculite, bat guano, worm castings, and other ingredients to make their own “super-soils”. If you look around on the internet, you can find many recipes on how to make your own super-soils. Nevertheless, let’s just keep it simple for the time being.

PLANT CONTAINERS
You can find many types of planters and growing containers today, from the simplest plastic flower pots to “smart” and self-watering pots. Here too, we don’t need to over-complicate things. Simple flower pots can provide us with all we need to get started with indoor cannabis growing. The most important thing is that you choose the right size of container for your plans. Many times, growers make the mistake of underestimating how large their plants can actually get. 20l pots are a good starting point for most indica-dominant and hybrid varieties.
There’s just one other thing that you need to consider when choosing your containers; they need to provide adequate drainage. Many pots will already have holes at the bottom or there will be spots where you can easily puncture the holes yourself.
Tip: Depending on your growing area and number of your plants, rectangular pots allow you to make better use of space!
CANNABIS NUTRIENTS
When you are starting out with growing cannabis, the nutrients in your potting soil won’t normally cover the entire duration of your grow. If you’re looking to supplement your growing medium with nutrients, liquid types are the most popular and easy to mix in.
Although there is an overwhelming variety of cannabis nutrients available on the market today, what you really need are two basic types of nutrients: nutrients for your plants’ vegetative phase and nutrients for bloom. Plants require a variety of macro and micronutrients to grow vigorously, but the three primary elements are nitrogen, phosphorus, potassium (NPK). During vegetative growth, plants are nitrogen-hungry. In bloom, plants no longer want much N; instead, they desire higher levels of P and K to develop many dense and flavourful buds.
Before you start feeding your plants like crazy, know that “nutrient burn” from giving plants too much food is common rookie mistake. This isn’t made easier by the fact that many nutrient manufacturers recommend extreme doses in order to sell more product. To keep the risk of overfeeding your plants low, it is good idea to start with half, or even ¼ of the recommended dose.
Another common mistake is feeding seedlings too early. Seedlings are very sensitive to overfeeding. As such, you should not feed freshly sprouted seedlings for 2-3 weeks. Only start feeding very light doses once your plants have grown their third set of real leaves.
THE PROPER WAY TO WATER
Just like with nutrients, cannabis growers tend to overdo it with watering. Overwatering is one of the most common and surprisingly fatal errors growers can make.
For healthy growth, it is best to water thoroughly, but intermittently. Give enough water to make sure that the entire soil is well-drenched until you see water draining out from the bottom of the container. What you do next is very important: allow your soil to dry out before watering again.
A simple “weight test” will give you an indication of the amount of water in your pots. Just lift up your containers, and you should get a pretty good read. Unfortunately, prolonged overwatering can lead to all sorts of problems later on down the road.

IMPORTANCE OF PH LEVEL OF YOUR WATER OR NUTRIENT SOLUTION
The correct pH level of the water or nutrient solution is often overlooked, especially by new cannabis growers. The thing with cannabis is that it has a very small window of optimal pH where plants can take in nutrients. If the pH level is off, the plants will go into nutrient “lockout” where they won’t absorb nutrients, even if they’re present. Because of that, it is important that the pH level of your water or nutrient solution is always correct.
When you grow in soil, things are a little bit more forgiving when it comes to pH. Soil can compensate for when the level is not quite optimal. Still, you should make sure that your water or nutrient solution is always within the pH range of 6.0-7.0.
To measure and correct pH, you can get a pH meter or pH-measuring drops in any grow store. With a few drops of “pH down” or “pH up”, you can increase or decrease the pH level of your water or nutrient solution accordingly.
AIR CIRCULATION
Cannabis cultivators, depending on how many plants they grow, may have quite elaborate requirements when it comes to air filtering and expelling unwanted smells. For our purposes, we don’t need to concern ourselves with those things yet. With a simple fan, you can provide your plants with a gentle breeze. Good air circulation can help to prevent mould; it helps keep temperatures down and can serve as a deterrent for some pests. Moreover, a gentle breeze from a fan can encourage your cannabis plants to grow stronger and more robust stems. Do be aware that depending on how many plants you cultivate, where, and when, you may require a more elaborate intake/exhaust fan system to keep things running smoothly.
CONTROLLING AND MONITORING YOUR GROW
With the right soil, proper grow lights, cannabis-specific nutrients and, of course, quality seeds, we have covered nearly all the elements that lead to a good harvest. All that’s left is to control and monitor growth for the best results.
We are keeping things simple, so we don’t need to engage in some type of rocket science. Simply connect your grow light to a timer so you can provide a consistent light-dark cycle during each phase of growth.
Once you get a little bit more experience, however, you can use a timer to give your plants 18 hours of light during the vegetative stage, and then initiate flowering by switching the schedule to 12-12, twelve hours of light, twelve hours of darkness. Autoflowering seeds can be left on 18 hours of light per day throughout their entire growth cycle.
We did our best to cover all the essentials of indoor cannabis growing, so now it’s up to you to use this information to ultimately achieve a bountiful harvest. In no time, you’ll realise what a proficient grower you are by observing your plants carefully and learning from your mistakes. Good luck.