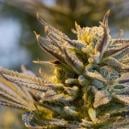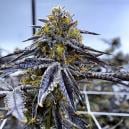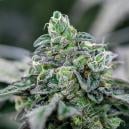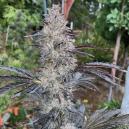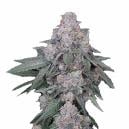
How To Decarboxylate Cannabis
Published : May 18, 2020

Interested in making your own cannabis edibles or extracts? Don't forget this essential first step. Follow our simple guide to decarboxylating your weed.
It's easy to take for granted, but heating up your cannabis is a requirement for getting high. Without heat, you might as well switch out your buds for broccoli and call it a day. Smoking makes things straightforward, but what about edibles, tinctures, and other ways to enjoy weed? Enter decarboxylation: a tried and true process for getting the most out of your marijuana.
WHAT IS DECARBOXYLATION AND WHY IS IT IMPORTANT?
Decarboxylation, or "decarbing", sounds like something you'd do in a lab (and you totally can, you mad scientist, you!). In reality, decarboxylation is just a fancy term for heating up your weed. Well, heating it to the right temperature, for the right amount of time.
Why is decarbing important? Essentially, it "activates" your weed. Raw cannabis contains the compound THCA, which is not psychoactive. To get high, you have to turn boring ol' THCA into its life-of-the-party cousin, THC. Likewise, decarbing turns CBDA into that star cannabinoid of-the-moment: CBD. How exactly? Heat removes the carboxyl group from the molecular structure of the first two compounds. Hence, the term de-_carboxyl_-ation.
WHEN DO YOU NEED TO DECARB YOUR CANNABIS?
The magic happens at temperatures around 108°C (225°F). So, when weed isn't being smoked or vaporized, it needs to be decarbed first, setting this transformation in motion. That means decarboxylation is a key step when cooking or baking with weed (or when otherwise making a tincture, infusion, or extract).

HOW TO DECARBOXYLATE CANNABIS
We've put together a list of popular methods for decarbing your weed at home, including the equipment you'll need. We've also included other considerations, like how much your house will smell like cannabis. Regardless of which method you choose, the first thing you should always do is:
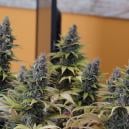
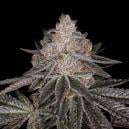
BREAK UP YOUR BUDS
Before cranking up the temp, break up your buds so they heat more evenly. You have the option of fully grinding them or breaking them into small pieces by hand. Either method is fine. It's a matter of personal preference and the tools you have at your disposal.
Grinding your weed tends to be quicker. In general, we recommend rendering everything to a coarse consistency, rather than a fine powder. You can use a handheld grinder, a coffee grinder, or a food processor for this. The latter is great for larger amounts, which is probably what you'll be working with if you make edibles. Just be careful to clean your tools well if you use them for regular cooking.
Breaking up your buds by hand—with or without scissors—is a slower process. That said, it can be meditative, and works perfectly fine in a pinch. You also won't lose any matter to the grinder and will be sure you're not grinding your weed too fine (which could cause it to burn later).
Once your bud is broken up, you have a few options for the actual decarboxylation process.
THE BAKING SHEET METHOD
This is the most popular, tried-and-true method for decarbing cannabis at home. On the upside, it's simple to execute using supplies you likely already have in your kitchen. On the other hand, it's the worst at hiding the delicious smell of cannabis. That could be a downside if you live in an apartment, have roommates, or have a nosy landlord.
EQUIPMENT
• Cannabis, coarsely broken up
• Baking tray
• Parchment paper or aluminum foil
• Oven mitts
• Oven
• Spatula
DIRECTIONS
1. Place your oven rack in the middle and preheat the oven to 108°C (225°F).
2. Cut a piece of parchment paper or aluminum foil to fit the size of your baking tray. Lay it on top of the tray. If you use foil, lightly crumple it first. This helps to avoid overheating your cannabis by minimising contact with the baking sheet itself (the baking tray conducts heat more efficiently than foil).
3. Spread your broken-up cannabis evenly across the foil or parchment paper, then put another layer of foil or paper on top.
4. Bake for 45 minutes. Check periodically to make sure it's not burning, and adjust the oven temperature if needed. After about 25 minutes, use a spatula to give the weed a stir. When it's done, your cannabis should be toasted a light golden brown.
5. Remove from heat and let cool at room temperature for 30 minutes.
6. Use the cannabis in your desired recipe, or store for future use.

THE MASON JAR METHOD
This method also uses the oven, but has a couple of added benefits. It significantly minimises the smell of cannabis by trapping the terpenes you would otherwise lose to evaporation. Your cannabis is also less likely to burn. For this method, your cannabis should be broken up to the size of flax seeds or rice grains.
EQUIPMENT
• Cannabis, ground into coarse grains
• One or more mason jars with a lids
• Baking tray
• Kitchen towel
• Oven mitts
• Oven
DIRECTIONS
1. Preheat your oven to 108°C (225°F).
2. Place your cannabis in the mason jar(s) and lightly screw on the lid(s).
3. Dampen the kitchen towel and place it on top of the baking sheet. Place the mason jar(s) on top of the damp towel.
4. Place everything in the oven and bake for 60 minutes. Every 15 minutes, put on the oven mitts and lightly shake the jars to redistribute the cannabis inside.
5. After the full 60 minutes, remove from heat and let the jars cool at room temperature for 30 minutes.
6. Use the cannabis in your desired recipe, or store for future use.

THE BAG-N-BOIL METHOD
This method is great if you don't have access to an oven (here's lookin' at you, hot-plate aficionados). It's also ideal for containing the smell of cannabis, if that's a concern for you. For a successful bag-n-boil, you'll want to grind your cannabis to a more powdery consistency (a loose powder will do—not super fine.
EQUIPMENT
• Cannabis, ground to a coarse powder
• Boil-safe, resealable bags
• Medium-large pot with a tight lid
• Water
• Tongs
• Stove-top
DIRECTIONS
1. Seal your cannabis into a boil-safe, Ziploc bag. The bag shouldn't be too full, and most of the air should be compressed out—this prevents it from popping when it expands with hot air later.
2. Fill your pot half-way with water, and bring to a rolling boil.
3. Gently lower your sealed bag(s) of cannabis into the pot, and place the lid on top.
4. Boil the bags (not simmer) for 90 minutes, checking to make sure the water in the pot doesn't boil away. Top up the water from a kettle as needed.
5. Remove the pot from the heat and let cool. Remove the bags from the water (with tongs as needed) and place on a rack to cool completely. Do not open the bags while they are still hot—you don't want to release any steam.
6. Use the cannabis in your desired recipe, or store for future use.

DON'T BE RASH, DECARB YOUR STASH!
To recap, decarboxylating your weed is a necessity if you're making edibles or extracts. Jumping headlong into a cannabutter recipe without this essential first step will result in a low-potency product—a waste of your weed and your time. By contrast, turning up the heat for a quick decarb session will help you get the most out of your cannabis recipes.
Now, go forth and make trays upon trays of weed brownies, gummy bears, and Mexican pot tacos. "It's gettin' hot in herre (so hot), so decarb all your weed. I am gettin' so hot, I'm gonna decarb my buds". #SorryNotSorry